Table of Contents
Quick Start
If you use URP, Weatherade automatically adds an additional renderer called SRS_DepthRenderer to the default URP asset's Renderer List (usually called URP-HighFidelity). You must add this renderer to any URP assets you use in your project.
1. Add Coverage Instance
Add Snow Coverage Instance or Rain Coverage Instance to your scene from the GameObject ⇒ NOT_Lonely ⇒ Weatherade menu.

2. Convert Materials
Weatherade uses its own shaders from the NOT_Lonely/Weatherade category.
Depending on which coverage instance type you selected in step 1, you can use the following shaders:
Snow
- NOT_Lonely/Weatherade/Snow Coverage
- NOT_Lonely/Weatherade/Snow Coverage (Terrain)
Rain
- NOT_Lonely/Weatherade/Rain Coverage
- NOT_Lonely/Weatherade/Rain Coverage (Terrain)
Manual Conversion
Select the object which you want to be covered by snow or rain, click on its material's shader dropdown and select one of the coverage shaders, depending on what type of coverage instance you created at step 1.
Automate Conversion
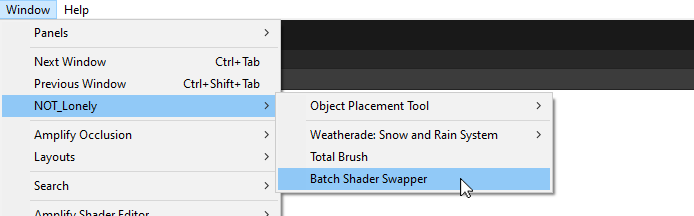
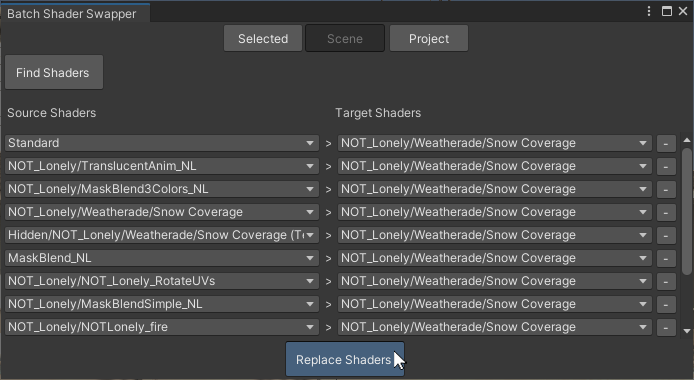
If you already have a lot of objects in your scene, you can quickly convert their materials to use the Weatherade shaders by going to the Window ⇒ NOT_Lonely ⇒ Batch Shader Swapper tool.
2.1. Select Conversion Mode
Here you can select a conversion mode by clicking the appropriate button:
- ⠀Selected⠀ - only the materials selected in the folders will be added.
- ⠀Scene⠀ - find materials that exist only in the currently open scene.
- ⠀Project⠀ - find all materials in the project.
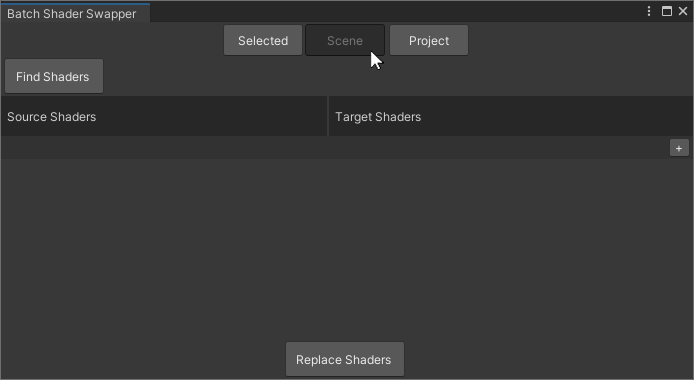
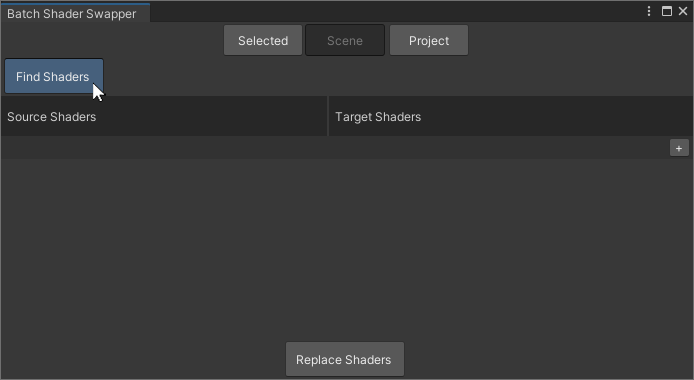
2.2. Find Shaders
After selecting the mode, click the ⠀Find Shaders⠀ button. The tool will find materials and show them grouped by the shaders they use, so you'll see a list of shaders below.
2.3. Edit Shader Pairs
Now you can edit every shader pair in the list. Set the “Target Shaders” to “Snow Coverage” or “Rain Coverage”, depending on what type of coverage instance you selected at step 1.
You can also remove any item from the list if you don't need this shader to be converted (for example, a particle effect shader), by clicking the ⠀-⠀ button to the right of it, or add a new element manually by clicking the ⠀+⠀ button under the last element.
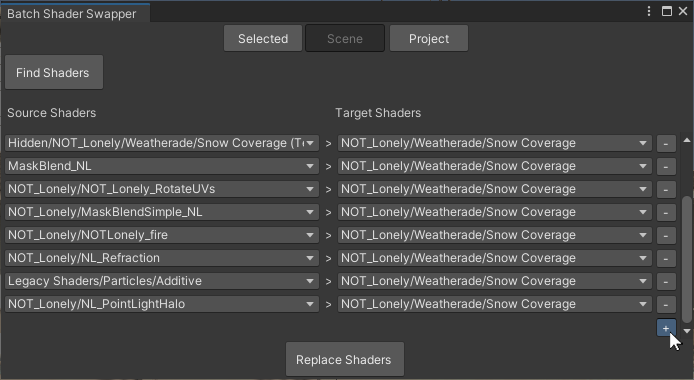
2.4. Convert
Once you done with the shaders list, press the ⠀Replace Shaders⠀ button.
3. Edit
A basic snow should appear on the surfaces once you finish with the previous steps. Now you can tweak it globally from the Snow Coverage Instance you created at the step 1, or override any property on a per-material basis.
3.1 Per Material Override
Using the coverage instance inspector, you can configure all coverage properties. But if you want a specific material to use a different value for a specific property, you can override that value by checking the checkbox to the left of the property name in the material inspector.