Table of Contents
Main Settings
The Main Settings foldout has the same properties in both Snow and Rain Coverage instances.

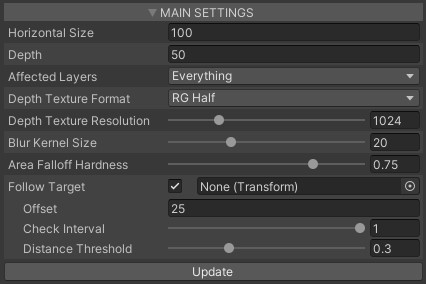
Horizontal Size
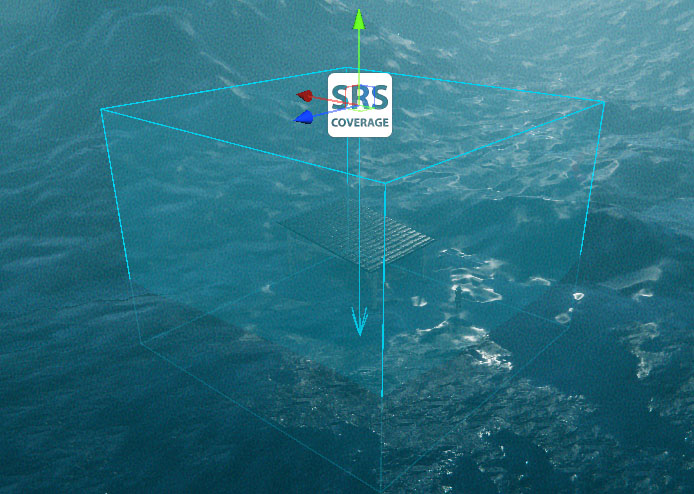
As stated before in the Quick Start, another important purpose of the Coverage Instance is that is's used to get the scene depth for the coverage occlusion feature. Internally it has a camera, which renders the scene from above the Follow Target (usually player camera) into the depth texture in a bounded square around the Follow Target and send it to all the shaders.

Hence, Horizontal Size is the area size around the Follow Target in the horizontal coordinate plane (XZ), where the coverage occlusion will work.
Depth
Occluded coverage area depth. In other words it's the max distance between the Coverage Instance object pivot and a surface that can be affected by the coverage instance, i.e. can be occluded.
Affected Layers
Objects placed on these layers will be “visible” for the Coverage Instance, i.e. can be occluded by other objects from these layers.
Depth Texture Format
The texture format of the depth texture can be selected from the dropdown:
- RG Half - is the most cheap option, but can provide banding artifacts at the coverage transitions.
- RG Float - much more precise, visible banding artifacts on the transition gradients, but more expensive.
- ARGB Half - same as RG Half, but has extra channels, which carry unmodified depth, that can be used for the GPU Particle System collision feature.
- ARGB Float - same as previous, but more precise.
Depth Texture Resolution
The resolution used for the depth texture. This value hits performance.

Blur Kernel Size
The amount of blur applied to the coverage occlusion mask. The larger the value, the more blur will be applied to the coverage mask. It also affects performance accordingly.
Area Folloff Hardness
Defines how hard the coverage area border will be. Values lower than 1 will add a gradient from the area center to its borders. The recommended value is around 0.7.
Follow Target
Forces the coverage instance to follow any object in the scene. The checkbox enables the use of the “Follow Target” function. The Transform field on the right allows you to explicitly specify the object to follow.
If enabled, next properties will also appear:
- Offset - the vertical position offset from the Follow Target.
- Check Interval - distance check interval in seconds between the “Follow Target” transform position and the Coverage Instance position. If set to 0, then the check will be performed every frame.
- Distance Threshold - defines how far the “Follow Target” object must move from the center of the Coverage Instance volume (including 'Offset') to update the Coverage Instance position.
Example: Distance Threshold = 0 - update every “Check Interval”, Distance Threshold = 0.5 - update, when the “Follow Target” is halfway from the Coverage Instance volume's center.
Update
Clicking the Update button reinitializes the Coverage Instance. Use it if you want to see changes after you edit any of the following properties: